


제목에서 알 수 있듯이 정수 값으로 히스토그램을 만들고 싶습니다. 내 MWE는 다음과 같습니다.
\documentclass[border=5]{standalone}

\usepackage{pgfplots}
%Random data between 10 and 20 -- could also be between 100 and 200 or what ever
\begin{filecontents*}{data.txt}
        18
        15
        18
        19
        14
        15
        12
        11
        18
        18
        12
        11
        17
\end{filecontents*}

\begin{document}
    \begin{tikzpicture}
        \begin{axis}[
            axis lines=left,
            ymajorgrids=true,
            title={Histogram},
            xlabel=points,
            ylabel=headcount,
            ybar
            ]
        \addplot+ [hist] table[y index= 0]{data.txt};
        \end{axis}
    \end{tikzpicture}
\end{document}
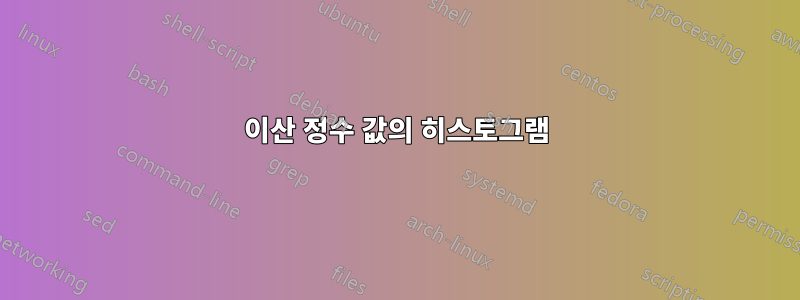
결과는 다음과 같습니다.

내가 얻고 싶은 것은 다음과 같습니다(참고: 불행하게도 값을 두 번 계산했습니다).
](https://i.stack.imgur.com/poWRU.png)
내 문제는 x축이 불연속적이어서 레이블이 이동된다는 것입니다. 막대 사이, 즉 y축과 첫 번째 막대 사이 및 끝 부분에 공간을 두고 싶습니다.
몇 가지 추가 정보: LaTeX를 사용하고 있습니다. 나는 이미 정밀도를 0으로 설정하고 datatool을 사용하여 먼저 빈도를 계산한 다음 간단한 막대 차트를 그리려고 했습니다. 다양한 라벨과 영역 스타일로 어려움을 겪었지만 목표를 달성하지 못했습니다.
답변1
gnuplot을 사용하여 히스토그램 데이터를 생성한 다음 이 데이터를 막대 그래프로 그릴 수 있습니다. 컴파일하려면 gnuplot이 설치되어 있어야 하며 다음을 사용하여 컴파일해야 합니다 --shell-escape.--shell-escape는 무엇을 합니까?
\begin{filecontents*}{data.txt}
18
15
18
19
14
15
12
11
18
18
12
11
17
\end{filecontents*}
\documentclass[tikz, border=1cm]{standalone}
\usepackage{pgfplots}
\pgfplotsset{compat=1.18}
\begin{document}
\begin{tikzpicture}
\begin{axis}[
ybar,
xmin=10, xmax=20,
ymin=0,
xtick distance=1,
axis lines=left,
ymajorgrids=true,
title={Not a Histogram}, xlabel=points, ylabel=headcount,
]
\addplot+[raw gnuplot] gnuplot {
binwidth=1;
bin(x,bw)=bw*floor(x/bw);
plot "data.txt" using (bin($1,binwidth)):(1.0) smooth freq;
};
\end{axis}
\end{tikzpicture}
\end{document}

답변2
Latex3무작위 선택을 통해 데이터를 준비할 수 있습니다 .\intarray_new:Nn \g_HISTO_myarray_intarray {9}
1에서 9 사이의 숫자를 제외하고(11, 12, ..., 19) 저장합니다. 파일에 쓸 때 10을 추가합니다.\jobname.data
이미 파일이 준비되어 있거나 데이터를 수동으로 수정하려는 경우 이 파일을 수정하고 주석을 달 수 있습니다
\histo[20].~와 함께
pgfplotsbar width=0.5cm그리고enlarge x limits={auto},enlarge y limits={upper},축에 달라붙지 않도록
코드
\documentclass[border=5mm]{standalone}
\usepackage{pgfplots}
\pgfplotsset{compat=1.18}
\ExplSyntaxOn
%%%%%%%%%%%%%%%%%%%%%%%%%%%
\sys_gset_rand_seed:n {240210}
%%%%%%%%%%%%%%%%%%%%%%%%%%%
\int_new:N \l_HISTO_randominteger_int
\intarray_new:Nn \g_HISTO_myarray_intarray {9}
\iow_new:N \g_HISTO_iow
%
\tl_new:N \l_HISTO_table_tl
\NewDocumentCommand{\histo}{O{10}}% 10 by default
    {
        \__array_fillarray:n{#1}
        \__array_table:
    }

\cs_new_protected:Nn \__array_fillarray:n
{
    \int_step_inline:nnn {1} {#1}
            {
                \int_set:Nn \l_HISTO_randominteger_int {\int_rand:nn {1} {9}}
                \intarray_gset:Nnn \g_HISTO_myarray_intarray
                    { \l_HISTO_randominteger_int }
                    {
                        \intarray_item:Nn \g_HISTO_myarray_intarray {\l_HISTO_randominteger_int} + 1
                    }
                %\int_use:N \l_HISTO_randominteger_int \quad % uncomment to see the numbers
            }
    %\intarray_log:N \g_HISTO_myarray_intarray% <-- to see the intarray in the log
}

\cs_new_protected:Nn \__array_table:
    {
        \iow_open:Nn \g_HISTO_iow {\jobname.data}
        \int_step_inline:nnn {1} {9}
            {
                \tl_clear:N \l_HISTO_table_tl
                \tl_put_right:Nn \l_HISTO_table_tl {\int_eval:n {10+##1}}%<-- between 11 and 19
                \tl_put_right:Nn \l_HISTO_table_tl {~}
                \tl_put_right:Nn \l_HISTO_table_tl {
                \intarray_item:Nn \g_HISTO_myarray_intarray {##1}}
                \iow_now:Nx \g_HISTO_iow { \l_HISTO_table_tl }
            }
        \iow_close:N \g_HISTO_iow
    }
\ExplSyntaxOff
\begin{document}
\histo[20]

\begin{tikzpicture}
    \begin{axis}[
        %width=8cm, height=8cm,
        axis lines=left,
        ybar,
        bar width=0.5cm,
        ymajorgrids=true,
        title={Histogram ?},%<-- ?
        %
        xlabel=points,
        ylabel=headcount,
        xticklabel style = {font=\small},
        xtick=data,
        enlarge x limits={auto},
        enlarge y limits={upper},
    ]
    \addplot table[y index=1]  {\jobname.data};
    \end{axis}
\end{tikzpicture}
\end{document}
