


(Leia antes de responder:) Vounãosubstitua a segunda foto por outra imagem de exemplo, o objetivo deste post é mostrar o problema que enfrentei ao tentar usar uma imagem real.
tenho o seguinte código que tem uma figura rebaixada para atender meu parâmetro de margem superior das dimensões da minha geometria o que resolveu o problema que perguntei há cerca de uma semana (sendo que a imagem ultrapassou a borda da margem), mas como posso fazer isso que algo assim é automatizado e feito sem especificar que quero que meu valor seja reduzido em 0,02 cm?
% {
\documentclass[letterpaper, 12pt]{article}
\usepackage{graphicx}
\usepackage{newfloat}
\usepackage[showframe, left=1.5cm, right=1.5cm, top=1.5cm, bottom=1.5cm]{geometry}
\usepackage{indentfirst}
\usepackage{fancyhdr}
\pagestyle{fancy}
\fancyhf{} % clear all header and footers
\cfoot{\thepage} % put the page number in the center footer
\renewcommand{\headrulewidth}{0pt} % remove the header rule
\addtolength{\footskip}{-.5cm} % shift the footer down which will shift the page number up
\usepackage[backend=biber]{biblatex}
\usepackage{subcaption}
\usepackage{adjustbox}
\usepackage{microtype}
\usepackage{csquotes}
\usepackage{lipsum}
\usepackage{unicode-math}
\setmainfont{Times New Roman}[Ligatures=TeX]
\setmathfont{STIX Two Math}
\usepackage[main=english,spanish]{babel}
\makeatletter
\renewcommand{\@maketitle}{%
\newpage
\null
\vspace{-0.125cm} % This corresponds to the top margin set by geometry
\begin{center}
\parskip=0pt
\let\footnote\thanks
{\LARGE \@title \par }%
\vspace{0cm} % Adjust this value to control the space between the title and author
{\large \lineskip .5em%
\begin{tabular}[t]{c}%
\@author
\end{tabular}%
\par }%
\vspace{.25cm} % Adjust this value to control the space between the author and date
{\large \@date }%
\end{center}\par
\vspace{.25cm} % Adjust this value to control the space between the date and content after maketitle
}
\makeatother % ask if you want to change the spacing of the 3 top sections
\renewcommand{\arraystretch}{1.5} % this makes tables look better
\setlength\parindent{.5cm}
% }
\title{Title Random}
\author{David Patterson}
\date{\today}
\begin{document}
\noindent
\begin{minipage}{\textwidth}
\maketitle
\end{minipage}
\begin{center}
\begin{large}
\textsc{\RN{1}. Introduction}
\end{large}
\end{center}
\lipsum[1]
\begin{figure}[htb]
\centering
\includegraphics[width=.5\textwidth]{example-image}
\caption*{Fig. 2: A random image.}
\label{example}
\end{figure}
\begin{center}
\begin{large}
\textsc{\RN{2}. Second Part}
\end{large}
\end{center}
\lipsum[2]
\newpage
\begin{figure}[htb]
\centering
\begin{adjustbox}{margin=.02cm}
\includegraphics[width=.4\textwidth]{04_figure.jpg}
\end{adjustbox}
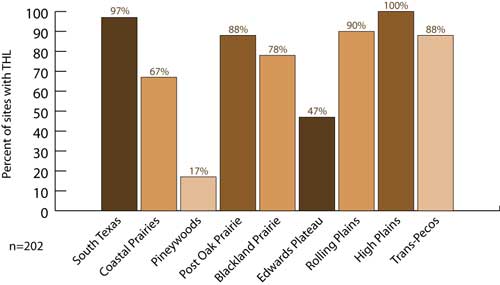
\caption*{Fig. 2: A statistic showing the population of the Texas Horned Lizard, with it having a low distribution percentage in the Pineywoods area.}
\label{Texas Horned Lizard}
\end{figure}
\end{document}

em comparação com o seguinte
% {
\documentclass[letterpaper, 12pt]{article}

\usepackage{graphicx}
\usepackage{newfloat}
\usepackage[showframe, left=1.5cm, right=1.5cm, top=1.5cm, bottom=1.5cm]{geometry}
\usepackage{indentfirst}
\usepackage{fancyhdr}
    \pagestyle{fancy}
    \fancyhf{} % clear all header and footers
    \cfoot{\thepage} % put the page number in the center footer
    \renewcommand{\headrulewidth}{0pt} % remove the header rule
    \addtolength{\footskip}{-.5cm} % shift the footer down which will shift the page number up
\usepackage[backend=biber]{biblatex}
\usepackage{subcaption}
\usepackage{adjustbox}
\usepackage{microtype}
\usepackage{csquotes}
\usepackage{lipsum}
\usepackage{unicode-math}
    \setmainfont{Times New Roman}[Ligatures=TeX]
    \setmathfont{STIX Two Math}
\usepackage[main=english,spanish]{babel}

\makeatletter
\renewcommand{\@maketitle}{%
\newpage
\null
\vspace{-0.125cm} % This corresponds to the top margin set by geometry
\begin{center}
\parskip=0pt
\let\footnote\thanks
{\LARGE \@title \par }%
\vspace{0cm} % Adjust this value to control the space between the title and author
{\large \lineskip .5em%
\begin{tabular}[t]{c}%
\@author
\end{tabular}%
\par }%
\vspace{.25cm} % Adjust this value to control the space between the author and date
{\large \@date }%
\end{center}\par
\vspace{.25cm} % Adjust this value to control the space between the date and content after maketitle
}
\makeatother % ask if you want to change the spacing of the 3 top sections

\renewcommand{\arraystretch}{1.5} % this makes tables look better

\setlength\parindent{.5cm}
% }

\title{Title Random}
\author{David Patterson}
\date{\today}

\begin{document}

\noindent
\begin{minipage}{\textwidth}
\maketitle
\end{minipage}

\begin{center}
\begin{large}
\textsc{\RN{1}. Introduction}
\end{large}
\end{center}

\lipsum[1]

\begin{figure}[htb]
    \centering
    \includegraphics[width=.5\textwidth]{example-image}
    \caption*{Fig. 2: A random image.}
    \label{example}
\end{figure}

\begin{center}
\begin{large}
\textsc{\RN{2}. Second Part}
\end{large}
\end{center}

\lipsum[2]

\newpage

\begin{figure}[htb]
    \centering
    \includegraphics[width=.4\textwidth]{04_figure.jpg}
    \caption*{Fig. 2: A statistic showing the population of the Texas Horned Lizard, with it having a low distribution percentage in the Pineywoods area.}
    \label{Texas Horned Lizard}
\end{figure}


\end{document}
e que resultou

Existe uma configuração adjustboxque pode fazer o que eu preciso fazer automaticamente? a imagem que está no meu exemplo é essa
Responder1
Depois de reduzir muito o seu exemplo para:
\documentclass{article}

\usepackage{graphicx,xcolor}
\usepackage[showframe, left=1.5cm, right=1.5cm, top=1.5cm, bottom=1.5cm]{geometry}

\begin{document}

\begin{figure}[htb]
    \centering
    \includegraphics[page=1,width=.4\textwidth]{example-image-a4-numbered}
    \caption{Test}
\end{figure}

\end{document}
Eu descobri que geometryessa opção showframeparece desenhar a linha superior do quadro da área de textodentroa área de texto. Você também pode fazer isso usando:
\documentclass{article}

\usepackage{xcolor}
\usepackage[showframe, left=1.5cm, right=1.5cm, top=1.5cm, bottom=1.5cm]{geometry}

\begin{document}

\noindent{\textcolor{red}{\raisebox{-\dp\strutbox}{\rule{.5\textwidth}{\textheight}}}}

\end{document}
Aqui está uma captura de tela do canto superior esquerdo com ampliação de 5000%:

Usando package showframe(e movendo o quadro para segundo plano):
\documentclass{article}

\usepackage{xcolor}
\usepackage[left=1.5cm, right=1.5cm, top=1.5cm, bottom=1.5cm]{geometry}
\usepackage[noframe]{showframe}
\AddToShipoutPictureBG{\ShowFramePicture}

\begin{document}

\noindent{\textcolor{red}{\raisebox{-\dp\strutbox}{\rule{.5\textwidth}{\textheight}}}}

\end{document}
mostra o resultado correto:

Voltando ao seu problema: Com seu exemplo mas pacote showframepara visualizar as áreas, recebo:

Então, IMHO, não há nenhum problema, mas uma abordagem do ditado alemão: “Wer viel misst, misst Mist.” (Em inglês: “Se você mede muito, você mede uma porcaria.”). Ou seja, a imagem é posicionada corretamente no topo da área de texto, portanto respeita as configurações de geometry, mesmo que o quadro exibido por geometrysugira o contrário.
BTW: Seu exemplo poderia ter sido reduzido sem perder nada para:
\documentclass{article}

\usepackage{graphicx,xcolor}
\usepackage[showframe, left=1.5cm, right=1.5cm, top=1.5cm, bottom=1.5cm]{geometry}

\begin{document}

\begin{figure}[htb]
    \centering
    \includegraphics[width=.4\textwidth]{04_figure.jpg}
    \caption{Test}
\end{figure}
e até mesmo para:
\documentclass{article}

\usepackage{graphicx,xcolor}
\usepackage[showframe, left=1.5cm, right=1.5cm, top=1.5cm, bottom=1.5cm]{geometry}

\begin{document}

\begin{figure}[htb]
    \centering
    \includegraphics[page=1,width=.4\textwidth]{example-image-a4-numbered}
    \caption{Test}
\end{figure}

\end{document}