


我有一些“有效”的東西,但我想知道是否有更優雅的解決方案。我想在投影機中逐項列出後將一些文字裝箱,所以這就是我正在做的事情:
\documentclass{beamer}

\begin{document}

\begin{frame}
\begin{itemize}[<+->]
  \item Software-as-a-Service?
  \item Platform-as-a-Service?
  \item \only<-4>{Infrastructure-as-a-Service}\only<5->{\fcolorbox{red}{white}{Infrastructure-as-a-Service}}?
  \item Other-stuff-as-a-Service?
\end{itemize}
\end{frame}

\end{document}
我得到了我想要的效果(在盒裝幻燈片上添加了一些空間,這並不理想),但我想知道是否有更自然的方法來做到這一點?我嘗試在網上和可信賴的地方搜索texdoc beamer,但也許我找錯了地方。
我也嘗試過:
\item \fcolorbox<beamer:6>{red}{white}{Infrastructure-as-a-Service}?
但這給我留下了一個黑框,直到紅色框被突出顯示
答案1
你可以使用經過嘗試和測試的tikzmark想法
程式碼
\documentclass{beamer}
\usepackage{tikz}
\usetikzlibrary{calc}

% tikzmark command, for shading over items
\newcommand{\tikzmark}[1]{\tikz[overlay,remember picture] \node (#1) {};}
\begin{document}
\begin{frame}

\begin{itemize}[<+->]
  \item Software-as-a-Service?
  \item Platform-as-a-Service?
  \item \tikzmark{infrastructure}{Infrastructure-as-a-Service}
  \item Other-stuff-as-a-Service?
\end{itemize}

    \pause\tikz[overlay,remember picture]{\draw[draw=red,thick,double,fill opacity=0.2] ($(infrastructure)+(-0.5,0.4)$) rectangle ($(infrastructure)+(6,-0.2)$);}
\end{frame}
\end{document}
答案2
另一種方法可能是利用中定義的樣式使用 TikZ 節點在 Beamer 中突出顯示。
代碼:
\documentclass{beamer}
\usepackage{lmodern}
\usepackage{tikz}
\usetikzlibrary{calc}
\usepackage{xparse}

\tikzset{
    invisible/.style={opacity=0,text opacity=0},
    visible on/.style={alt=#1{}{invisible}},
    alt/.code args={<#1>#2#3}{%
      \alt<#1>{\pgfkeysalso{#2}}{\pgfkeysalso{#3}}
    },
}

\tikzset{
  background fill/.style={fill=#1},
  background fill/.default={white},
  fill on/.style={alt=#1{}{background fill}},
}

\tikzset{
  background draw/.style={draw=#1},
  background draw/.default={white},
  draw on/.style={alt=#1{}{background draw}},
}

\tikzset{
  background filldraw/.style args={#1 filled by #2}{draw=#1, fill=#2},
  background filldraw/.default=white filled by white,
  filldraw on/.style={alt=#1{}{background filldraw}},
}

\tikzset{highlighting/.style={
   append after command={
   \pgfextra{
      \path[rounded corners,
         background draw=red,
         draw on=<#1>,
         overlay] ($(\tikzlastnode.south west)+(-0.015,-0.1)$) % to have some offset
         rectangle ($(\tikzlastnode.north east)+(0.015,0.065)$);
      }
    }
  }
}

\NewDocumentCommand{\highlight}{r<> m}{%
\tikz[baseline=(A.base)]
 \node[highlighting=#1,
   inner sep=0pt] (A) {#2};%
}

\begin{document}

\begin{frame}{Itemize with styles}
\begin{itemize}[<+->]
  \item Software-as-a-Service?
  \item Platform-as-a-Service?
  \item \highlight<5>{Infrastructure-as-a-Service}?
  \item Other-stuff-as-a-Service?
\end{itemize}
\end{frame}

\end{document}
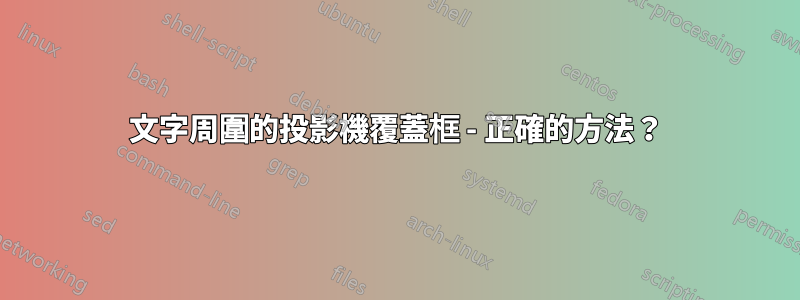
結果:

程式碼註解
由於選項 ,創建的 TikZ 節點不會佔用太多空間inner sep=0pt,但由於其尺寸在文字周圍非常緊密,因此創建的突出顯示框會在周圍添加一些空間(透過庫創建的偏移量calc)。為了避免這個額外的空間可能破壞對齊,該overlay選項已被引入到突出顯示路徑中。
現在,無需更改 內的任何內容document,就可以透過選擇不同的樣式來獲得不同的效果:
\tikzset{highlighting/.style={
   append after command={
   \pgfextra{
      \path[rounded corners,
         background fill=red!30, % filling
         fill on=<#1>, % filling overlay specification
         overlay] ($(\tikzlastnode.south west)+(-0.015,-0.1)$) % to have some offset
         rectangle ($(\tikzlastnode.north east)+(0.015,0.065)$);
      }
    }
  }
}
給出:

儘管:
\tikzset{highlighting/.style={
   append after command={
   \pgfextra{
      \path[rounded corners,
         background filldraw=red filled by red!30, % border+filling
         filldraw on=<#1>, % overlay specification
         overlay] ($(\tikzlastnode.south west)+(-0.015,-0.1)$) % to have some offset
         rectangle ($(\tikzlastnode.north east)+(0.015,0.065)$);
      }
    }
  }
}
給出:

可自訂的偏移量
透過這個改進的版本,可以hf-tikz透過偏移量自訂突出顯示的區域(從包中藉用的想法)。此偏移量最終是 pgfkey,其值必須在命令的可選參數中宣告\highlight:
\highlight<overlay specification>[offsets]{text}
如果未[offsets]指定,則採用初始值。
代碼:
\documentclass{beamer}
\usepackage{lmodern}
\usepackage{tikz}
\usetikzlibrary{calc}
\usepackage{xparse}

\tikzset{
    invisible/.style={opacity=0,text opacity=0},
    visible on/.style={alt=#1{}{invisible}},
    alt/.code args={<#1>#2#3}{%
      \alt<#1>{\pgfkeysalso{#2}}{\pgfkeysalso{#3}}
    },
}

\tikzset{
  background fill/.style={fill=#1},
  background fill/.default={white},
  fill on/.style={alt=#1{}{background fill}},
}

\tikzset{
  background draw/.style={draw=#1},
  background draw/.default={white},
  draw on/.style={alt=#1{}{background draw}},
}

\tikzset{
  background filldraw/.style args={#1 filled by #2}{draw=#1, fill=#2},
  background filldraw/.default=white filled by white,
  filldraw on/.style={alt=#1{}{background filldraw}},
}

\pgfkeys{/highlight/.cd,
  above right offset/.initial={0.015,0.065},
  above right offset/.get=\aboverightoffset,
  above right offset/.store in=\aboverightoffset,
  below left offset/.initial={-0.015,-0.1},
  below left offset/.get=\belowleftoffset,
  below left offset/.store in=\belowleftoffset,
}

\tikzset{highlighting/.style={
   append after command={
   \pgfextra{
      \path[rounded corners,
         background filldraw=red filled by red!30,% border+filling
         filldraw on=<#1>, % overlay specification
         overlay] ($(\tikzlastnode.south west)+(\belowleftoffset)$) % to have some offset
         rectangle ($(\tikzlastnode.north east)+(\aboverightoffset)$);
      }
    }
  }
}

\NewDocumentCommand{\highlight}{r<> O{} m}{%
\pgfkeys{/highlight/.cd,#2}
\tikz[baseline=(A.base)]
 \node[highlighting=#1,
   inner sep=0pt] (A) {#3};%
}

\begin{document}

\begin{frame}{Itemize with styles}
\begin{itemize}[<+->]
  \item Software-as-a-Service?
  \item Platform-as-a-Service?
  \item \highlight<5>{Infrastructure-as-a-Service}?
  \item \highlight<6>[below left offset={-0.1,-0.2},above right offset={0.25,0.15}]{Other-stuff-as-a-Service}?
\end{itemize}
\end{frame}

\end{document}
結果:
