


答案1
所有的東西,淺藍色的臉(甚至是深藍色的臉)上寫的東西似乎都具有剖面或類似的功能。所以,在我看來,這似乎是不變的文本,不會改變。
空白處的文字似乎是可變文本。
如果我的假設是正確的,您當然可以定義一些 LaTeX 變數來填入不同文字的部分。您需要定義一個命令或環境,它將產生表並填入先前定義的變數的內容。
這應該很容易。
同時:這是我的 MWE。
通常,我會將定義放在它自己的樣式檔案中。在這種情況下,您不需要\makeatletterand\makeatother。
我定義了一些內部變量,例如\course@title.這@使得它們在普通文件中無法使用。使用@可以使變數名稱安全。您不會偶然在文件中定義第二個變數。
我還定義了使用者空間命令來操作變數的內容。
我還為文本的那些部分的名稱定義了變量,這些部分不會改變,即用作節名稱的常數文本。如果您確定永遠不需要更改此部分名稱,則無需在變數中定義這些名稱。只需直接在命令中使用部分名稱即可。但是,如果其中部分或全部部分名稱可能發生更改,那麼您是安全的。
最後我定義了指令\coursetable(所以我不相信這真的是一個很好的巨集名稱。你已經被警告過。)它將為我們進行排版。
透過將所有內容放入一個巨集中,您可以自由地按照您喜歡的任何順序填充變數。沒關係。
\documentclass{article}
\usepackage{graphicx}
\usepackage{tabularx}


%% Some new column declarations
\newcolumntype{C}{>{\centering\arraybackslash}X}
\newcolumntype{L}{>{\raggedright\arraybackslash}X}

%% Dont use indent here!
\setlength{\parindent}{0pt}

%% maybe we need a uniqe skip:
\newlength{\myskip}\setlength{\myskip}{4ex}

%% Define some variables
\makeatletter
\def\course@title{}
\def\course@institute{Institute for Typography}
\def\course@teacher{}
%% This time with a default
\def\course@term{Summer2017}
\def\course@content{The course will explain the content of the course}
%% Define also the section names
\def\course@institutename{Institute}
\def\course@titlename{Course}
\def\course@teachername{Professor}
\def\course@termname{Semester}
\def\course@contentname{Contents}

%% Define the command, which will create the table right now.
\newcommand{\coursetable}{%
  % start a new page
  \clearpage%
  \thispagestyle{empty}%
  % Put in the Logos
  \includegraphics[width=2cm]{example-image-a}%
  \hfill%
  \includegraphics[width=2cm]{example-image-b}%
  \vspace{\myskip}
  \begin{tabularx}{\linewidth}{|C|C|}
    \hline
    \textbf{\course@titlename} & \textbf{\course@termname} \\
    \hline
    \course@title & \course@term \\
    \hline
    \textbf{\course@teachername} & \textbf{\course@institutename} \\
    \hline
    \course@teacher & \course@institute\\
    \hline
  \end{tabularx}

  \vspace*{\myskip}
  \begin{tabularx}{\linewidth}{|L|}
    \hline
    \multicolumn{1}{|C|}{\textbf{\course@contentname}}\\
    \hline
    \course@content\\
    \hline
  \end{tabularx}
  \vfill
  Signature: \hrulefill

}

%% Define user space commands to manipulate the internal variables
\newcommand{\courseterm}[1]{\def\course@term{#1}}%
\newcommand{\coursetitle}[1]{\def\course@title{#1}}%
\newcommand{\courseinstitute}[1]{\def\course@institute{#1}}
\newcommand{\courseteacher}[1]{\def\course@teacher{#1}}
\newcommand{\coursecontent}[1]{\def\course@content{#1}}

%% Reserve the @-sign.
\makeatother

\begin{document}

%% The order, in which you define the variables, does not matter.
\coursetitle{Beautiful Concepts}
\courseteacher{Prof. Dr. Drofnats}
\coursecontent{We will discuss in deep, if good typography will enhace
every document of the world.  Therefore we will study two or three
examples}

%% Now, build this table.
\coursetable
\end{document}
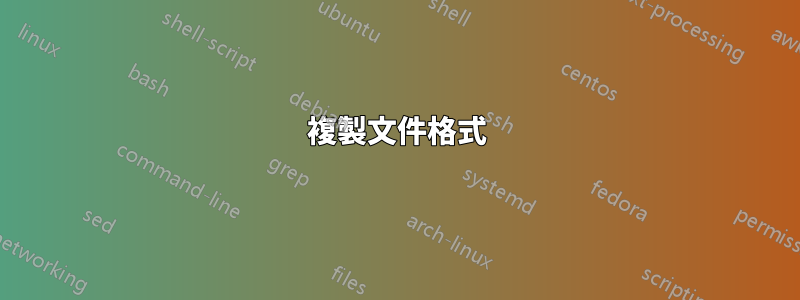
這就是結果。當然,它與您的範例不同,但我希望它能向您展示文件的使用方法。
編輯:我忘記提到的一件事:看看 -package xcolor,以獲得那些藍色的表格行。
