


\documentclass{article}
\usepackage{pgfplots}
\begin{document}
\pgfplotsset{testbar/.style={
title=strookdiagram sporten,
xbar stacked,
width=10cm,
axis y line*= none, axis x line*= bottom,
xmajorgrids = true,
xmin=0,xmax=100,
ytick = data,
yticklabels = {},
tick align = outside, xtick pos = left,
bar width=6mm, y=8mm,
enlarge y limits={abs=0.625},% 0.5 + 0.5*(y - bar width)/y [TeX.sx #47995]
nodes near coords,
nodes near coords align={left},
}}
\begin{tikzpicture}
\begin{axis}[testbar]
    \addplot[fill=red!40] coordinates{(20,0) };
    \addplot[fill=gray!40] coordinates{(10,0)};
    \addplot[fill=green!40] coordinates{(20,0) };
    \addplot[fill=orange!40] coordinates{(40,0) };
    \addplot[fill=blue!40] coordinates{(3,0) };
    \addplot[fill=red!40] coordinates{(7,0) };
\end{axis}
\end{tikzpicture}
\end{document}
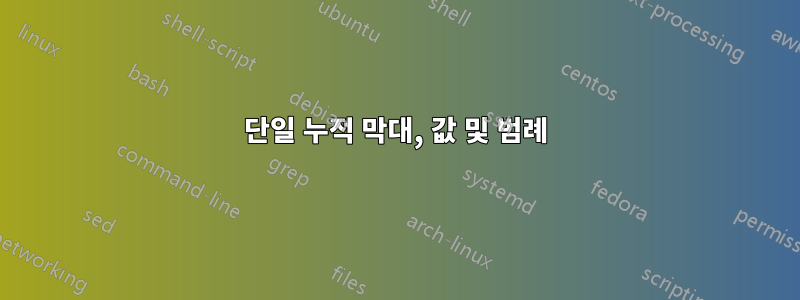
저는 범례와 각 조각의 백분율이 포함된 수평 누적 막대 그래프를 만들고 싶었습니다. 위의 코드는 다음을 제공합니다.

하지만 보시다시피 백분율은 모두 0입니다. 나도 전설을 원한다. 미리 감사드립니다.
편집하다
Jesse의 도움으로 코드를 변경했으므로 이제 코드는 다음과 같습니다.
 \documentclass{article}
 \usepackage{pgfplots}
 \usetikzlibrary{positioning}
 \begin{document}
 \pgfplotsset{testbar/.style={
 title=strookdiagram sporten,
 title style={yshift=10pt},
 xbar stacked, area style,
width=10cm,
axis y line*= none, axis x line*= bottom,
xmajorgrids = true,
xmin=0,
xmax=100,
x=1mm,
xtick={0,10,...,100},
ytick = data,
yticklabels = {},
tick align = outside, xtick pos = left,
bar width=6mm, y=8mm,
enlarge y limits={abs=0.625},% 0.5 + 0.5*(y - bar width)/y [TeX.sx #47995]
%nodes near coords,
nodes near coords={\pgfmathprintnumber\pgfplotspointmeta\%}
every node near coord/.append style={rotate=-90,font=\small, left,shift={(axis direction cs:-3,0)}}
}}
\begin{tikzpicture}
\begin{axis}[testbar,legend style={area legend, at={(0.5,-0.85)}, anchor=north, legend columns=-1}]
\addplot[fill=red!40] coordinates{(20,0) };
\addplot[fill=gray!40] coordinates{(10,0)};
\addplot[fill=green!40] coordinates{(20,0) };
\addplot[fill=orange!40] coordinates{(40,0)};
\addplot[fill=blue!40] coordinates{(3,0) };
\addplot[fill=red!40] coordinates{(7,0) };
\legend{Voetbal,Netbal,C,D,E,F}
\end{axis}
\end{tikzpicture}
\end{document}
하지만 그것이 나에게 주는 이미지는 지금이다.

TeX Live Utilty로 모든 패키지를 업데이트했으며 TeX 편집기는 TeXpad입니다.
답변1
이 시도는 두 가지 해결책을 제공하려고 합니다. 스태킹이란 연속된 명령의 x 또는 y 좌표를 서로 위에 추가하는 것을 의미하므로 \addplot(여기서는 x 방향) 특히 90%와 3%가 겹치게 됩니다.
상단의 첫 번째 해결 방법은 레이블을 -90도 회전하고 작은 글꼴 크기를 사용하는 것입니다. 이를 위해서는 every node near coord/.append style명령을 통해 추가 스타일을 정의하는 것입니다. Shift 명령은 shift={(axis direction cs:-3,0)}더 나은 가독성을 위해 상자와 충돌하지 않도록 레이블을 위로 이동하는 것입니다.
하단의 두 번째 플롯은 y 좌표를 동일한 y=0에서 y=0,1,2,3,4,5로 변경하여 기본 레이블 방향을 변경하지 않고 계단처럼 만듭니다. 또한 이 플롯에서는 레이블이 단일 수평 누적 막대로 축소되는 경우 레이블이 오버레이되는 이유를 관찰할 수 있습니다.
범례의 경우 범례 스타일은 을 통해 정의됩니다 legend style={area legend, at={(0.5,-0.15)}, anchor=north, legend columns=-1}.

\documentclass{article}
\usepackage{pgfplots}
\usetikzlibrary{positioning}
\begin{document}
\pgfplotsset{testbar/.style={
title=strookdiagram sporten,
xbar stacked, area style,
width=10cm,
axis y line*= none, axis x line*= bottom,
xmajorgrids = true,
xmin=0,xmax=100,
ytick = data,
yticklabels = {},
tick align = outside, xtick pos = left,
bar width=6mm, y=8mm,
enlarge y limits={abs=0.625},% 0.5 + 0.5*(y - bar width)/y [TeX.sx #47995]
nodes near coords,
every node near coord/.append style={rotate=-90,font=\small, left,shift={(axis direction cs:-3,0)}}
}}
\begin{tikzpicture}
\begin{axis}[testbar,legend style={area legend, at={(0.5,-0.85)}, anchor=north, legend columns=-1}]
    \addplot[fill=red!40] coordinates{(20,0) };
    \addplot[fill=gray!40] coordinates{(10,0)};
    \addplot[fill=green!40] coordinates{(20,0) };
    \addplot[fill=orange!40] coordinates{(40,0)};
    \addplot[fill=blue!40] coordinates{(3,0) };
    \addplot[fill=red!40] coordinates{(7,0) };
   \legend{A,B,C,D,E,F}
\end{axis}
\end{tikzpicture}

\vspace{1cm}

\pgfplotsset{testbar/.style={
title=strookdiagram sporten,
xbar stacked, area style,
width=10cm,
axis y line*= none, axis x line*= bottom,
xmajorgrids = true,
xmin=0,xmax=100,
ytick = data,
yticklabels = {},
tick align = outside, xtick pos = left,
bar width=6mm, y=8mm,
enlarge y limits={abs=0.625},% 0.5 + 0.5*(y - bar width)/y [TeX.sx #47995]
nodes near coords,
nodes near coords align={left}
}}
\begin{tikzpicture}
\begin{axis}[testbar,legend style={area legend, at={(0.5,-0.15)}, anchor=north, legend columns=-1}]
    \addplot[fill=red!40] coordinates{(20,0)};
    \addplot[fill=gray!40] coordinates{(10,1)};
    \addplot[fill=green!40] coordinates{(20,2) };
    \addplot[fill=orange!40] coordinates{(40,3) };
    \addplot[fill=blue!40] coordinates{(3,4) };
    \addplot[fill=red!40] coordinates{(7,5) };
   \legend{A,B,C,D,E,F}
\end{axis}
\end{tikzpicture}
\end{document}
편집하다:
OP는 숫자 대신 백분율을 사용하는 것을 선호합니다. 그런 다음 해당 줄을
nodes near coords={\pgfmathprintnumber\pgfplotspointmeta\%}.제목을 더 위로 이동하려면
title style={yshift=10pt}추가된 %가 이전 설정의 제목과 충돌하기 때문에 첫 번째 플롯의 축에 추가하세요.axis on top=false상단 의 그리드를 제거하려면testbar/.style
이러한 변경 사항이 적용되면 새로운 출력이 아래와 같이 표시됩니다.
